Once we have planned our day we will want to take action on that plan. As the day goes we can expect us to have moments where we lose focus on what we are working on, to have interruptions come up and to go off track. The Clapperboard is designed to offer clarity through the chaos.
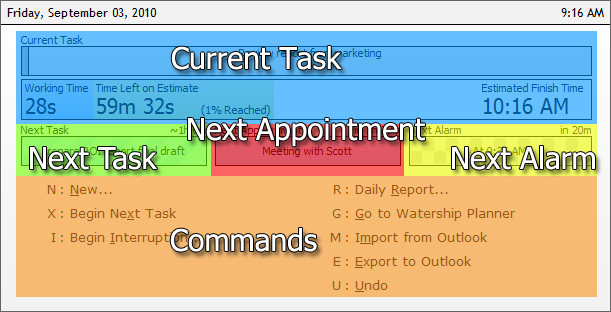
Figure 1. The different areas of the Clapperboard.
This area shows the currently timed task. At times if you forget what you are working for a moment you can refresh yourself with this. The second line shows the time statistics based on the current estimate as well as the current amount of time spent on this task.
Shows the next task scheduled.
Shows the next appointment.
Shows the next alarm. Note that this only shows alarms that are set to a specific time. Other alarms, such as alarms set for when a certain task begins, could actually come before the alarm shown here.
A list of the current command that can be invoked in this menu. You may navigate through the menus by pushing the letter associated with each command. To go back a menu hit the Escape key.
The default hot key for bringing up the Clapperboard is the Windows Key + W. This key combination can be used from any program to bring up the Clapperboard.
The hot key can be changed in the Options window.
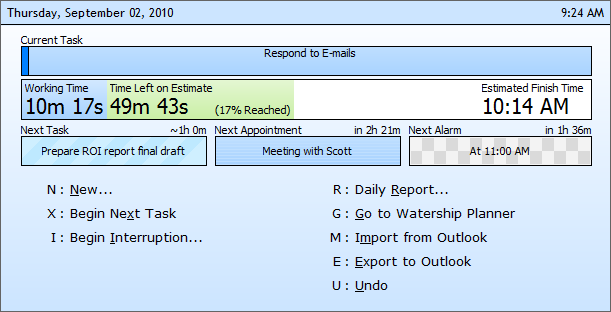
Figure 2. The default hot key for bringing up the Clapperboard is the Windows Key + ; (semicolon key).
When you complete the current task you are working on you can switch to the next task by hitting 'X' for the "Begin Next Task" command. This will set the current task as completed and begin timing the next task.
If you'd like more options hold shift before hitting the 'X' key. A menu will appear allowing you to set the status of the currently timed task.
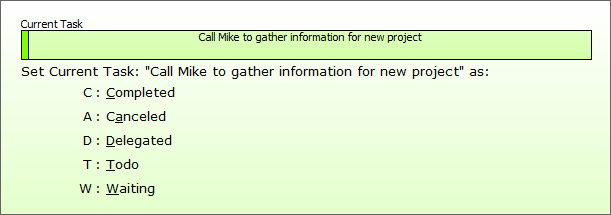
Figure 3. To set the status of the current task when switching hold the Shift key before hitting 'X' for the "Begin Next Task" command.
While you are working through the day and timing the tasks you are working on you are leaving a trail behind of what you have been working on. When an interruption comes up labeling it as an interruption will allow the automatic scheduler to take it into account as well as leaving behind a tracked time of the interruption for measurement.
To begin an interruption bring up the Clapperboard and press the 'I' key. The interruption menu will appear.
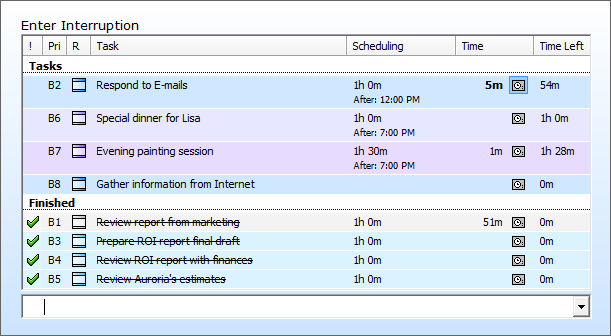
Figure 4. The Interruption Menu.
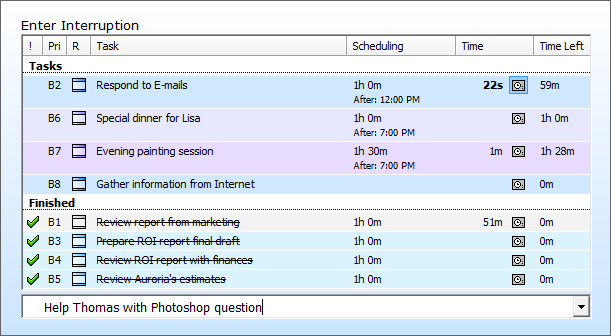
Figure 5. Typing in a new interruption. The task will be created and the timer will start on it.
You can also switch to a task that has already been accomplished by using the arrow keys and selecting the task you'd like to switch to. This can include a task that has already been completed where you forgot something.
You can quickly add a task into Watership by bringing up the Clapperboard and typing the 'N' key for the "New..." menu. From there hit 'T' for a new task. So the entire sequence would be:
Windows Key + W to bring up the Clapperboard.
-then-
'N' to bring up the "New..." menu.
-then-
'T' to bring up the "New Task" menu.
-then-
Begin typing the title of the task and hit enter when finished.

Figure 6. The New Item Menu.

Figure 7. Adding a new task by typing and hitting Enter.
Using the Clapperboard you can also leave comments associated with your task. Bring up the Clapperboard and type the 'N' key for the "New..." menu. From there hit 'C' for a new comment. If you have a task that is currently being timed, it will be associated with the comment entered. When the "New Comment" menu comes up you can begin typing in your comment. Enter will go to the next line so use Ctrl + Enter when you are finished to add the comment.
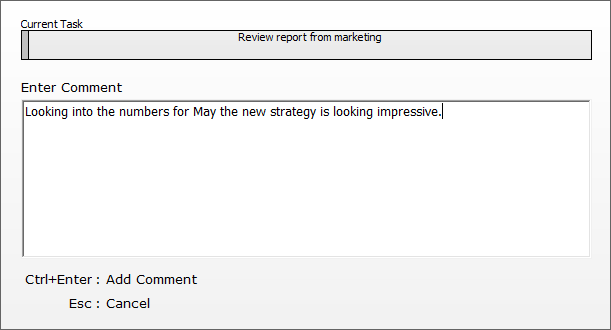
Figure 8. Adding a new comment.
You can view how you are currently during at any time by hitting 'R' in the Clapperboard for the "Daily Report" command.
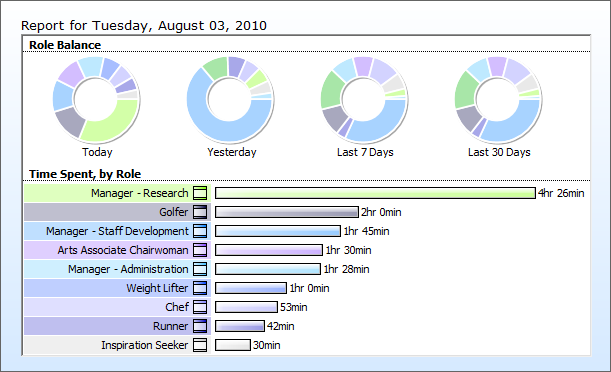
Figure 9. Viewing the Daily Report.
The key combination for bringing up the Clapperboard can be configured in the Options window that is in the Tools > Options menu. From there click on the "Clapperboard" in the left list to bring up the specific options associated with the Clapperboard.
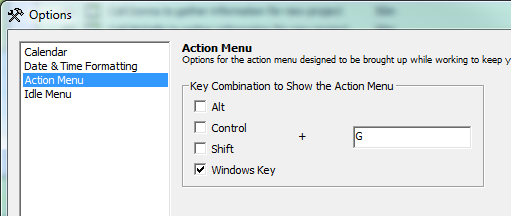
Figure 10. Setting the key combination for bringing up the Clapperboard.