The Day Tab is the detailed Day Planner for the associated day. You can move around the dates with the toolbar commands, or with Alt+Up and Alt+Down. The Day Tab is a detailed view of all the items associated with that day. Typically in the morning—or evening if you like to plan your day the evening before—you will set up everything in this window. Once you are actually in the day—after everything has been planned—you follow the plan in quick hit and run bursts of recalibrating your attention via the clapperboard.
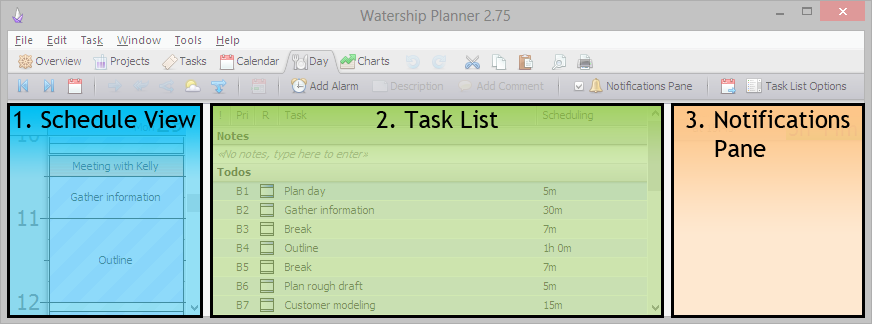
Figure 1. The different components that make up the Day Planner.
A visual timeline of the day, meant more for viewing what your time looks like.

Appointment
A task with a "hard" start time. Time mapping will move todos around these and never adjust the start and end times of these.

Todo
A task with an estimated duration. These have "flexible" start times--though a preferred order based on their day priority. These will be "mapped" by time mapping around appointments in the order of their priority--with some expections to make the best use of the space around fixed appointments and to attempt to fulfill any constraints other todos may have. These are only shown in the future.

Tracked time
A period of time associated with a task. These are the recorded times of where your time really went. The only thing that the Schedule View displays in the past are appointments and tracked times.

Working time
Your working hours as set in the Options Window. Future dates will use the start of the working hours to designate where time mapping should begin placing todos with estimates.

Awake time
This is the default time when not working or sleeping. You can plan on any hour--but the assumption is that these hours will be free more often. You can also use it as a guide for when to start routines to transition into the different parts of the day: morning, work, evening.

Asleep time
The hours you set aside for sleep.
A list of the tasks assigned to that day including all relevant information. Also included notes for the day.
Task List Columns
This will hide and display different task attributes, and sets the width for each column. Right clicking lets you select which columns are shown.
Day Notes
A scratch pad for notes that will be associated with the day you are on.
Todos
A list of your todos. You can also tell by the day priority, appointments don't have the index or number part, just the priority or letter--but todos have the index or numerical part as a ranking order makes sense to them.

Appointments
A section dedicated to your appointments. Note that the day priorities don't have an numerical part, as appointments tell the time mapper not to move them around they are above the day priority ranking.
A list of everything that is currently set to notify you of something.
Alarms
Any alarms associated with the day, or with tasks associated with the day. Not all alarms have triggers that can be determined up front, e.g.: an alarm that triggers when a timer stops.
Schedule Before Constraints
Any schedule before constraints that apply to the day. You won't necessarily get a notification for one of these if you get the task finished before hand.
Deadlines
Any deadlines that apply to the day. As with the schedule before constraints, you will only get notified when the schedule is at risk of not making the deadline.
The schedule view maps your schedule on a timeline. The schedule view is designed to view what your day is scheduled to look like. Changes to a task's constraints will reflect themselves here in how time mapping arranges your todos. It doesn't offer as many opportunities for task manipulation, like the task list that was designed for entering and changing information.
By selecting a range of time and typing you can create appointments. This way is more visual and the recommended method for creating appointments.
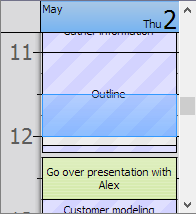
Figure 2. A selection over todos.
Notice that you can select over todos. Since the start times aren't set in stone, they will get out of the way when if you put an appointment there.
Normally tracked times are set by starting and stopping timers on a task. Sometimes you need to adjust these however. You can select a new time period and assign this to an existing task—or new task—via the context menu.
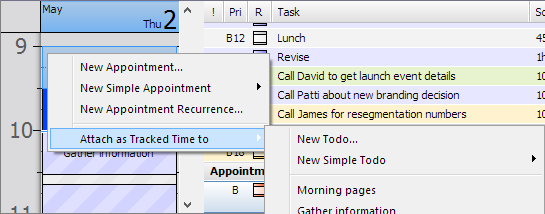
Figure 3. By right clicking on a selected time range, you get a context menu that allows you to assign this selected time range with a tracked time.
If you already have a tracked time that is associated with the wrong task, you can right click on it to assign it to another task.
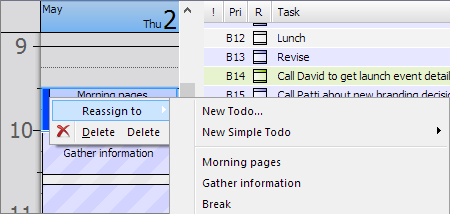
Figure 3. By right clicking on a tracked time, you get a context menu that allows you to reassign it.
The Task List displays the day's tasks and associated information, as you'd expect. It also lets you edit task attributes directly without opening property windows.
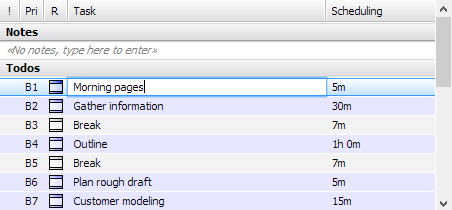
Figure 2. Editing a Task.
For example, in figure 2 if I begin typing I will replace the current task's caption. This is because the focus cell was on the task column, and by typing I'm changing that attribute. What is the task attribute of a task? It's really just the task's caption, or the short description associated with it.
Keys are directed to the focused cell. You can also think of this as the selected cell. The difference between these terms is that you can have more than one row selected at once—such as when you hold down Ctrl when clicking items—but you can only ever have one row with focus on it.
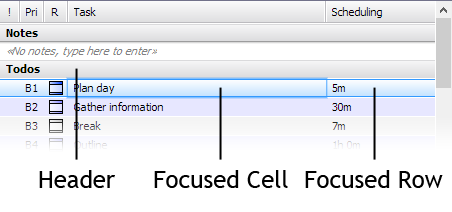
Figure 3. A focused row in the Task List.
| Key | Command |
|---|---|
| Left Right |
Move the focus to the cell to the left (or right). |
| Ctrl+Left Ctrl+Right |
Outdent (or indent) the focused row. Only available in Projects Tab. |
| Up Down |
Change focus to the row above (or below). |
| Shift+Up Shift+Down |
Extend the selection up (or down) by a row. |
| Ctrl+Up Ctrl+Down |
Move the selected rows up one. This is how you can manipulate the priorities of tasks to be in the order that you want. |
| Space | Append a space to the current cell. Use this when you don't want to change the text, but add to it. |
| Any letter or number, but the spacebar |
Begin overwriting the focused cell's value. |
| Backspace | Backspace over the focused cell's last character. |
| Delete | Delete the current row. |
| Enter | Create a new task. If the focused row was a task, then the new task will have the next priority of that task. |
Most columns are associated with an "Embedded" control. When you begin typing, the input is directed to the control associated with the currently focused cell to change the value of that attribute.
Generally embedded controls use Enter to accept the value, and Esc to discard the changes being made.
Edit controls come in two flavors depending on if they expect multiple lines or not. Normally they don't and Enter will commit the changes. You can tell quickly by the background color: white is single line, and pale orange is multi-lined. The only difference is that an Enter in a multi-lined control will add another line, and Ctrl+Enter is used to commit values. If you have trailing newlines because you forgot you were in a multi-lined edit control, you can leave them there and commit with Ctrl+Enter. These trailing newlines will be stripped out after committing.

Figure 4. Multi-lined embedded edit control with a pale orange background. Enter adds a new line, Ctrl+Enter commits.
Figure 5. Single-lined embedded edit control with a white background. Enter commits.
Each day has notes associated with it. To enter notes, double click the notes area. Notice that the background is a pale orange, this is because the text control is expecting multiple lines.
To enter notes ensure that the notes toolbar button is pressed and the top of your task list will have an area for notes. Select the area that says "<No notes, type here to enter>" and begin typing your notes.
You can add another line by hitting enter. When you are finished click somewhere outside the text area or press Ctrl + Enter. If you want to cancel your notes, press Esc.
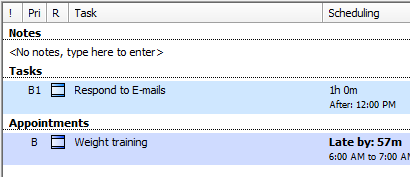
Figure 2. The Task List with the Notes toolbar button pressed.
You can enter a new todo by pressing Ctrl + Enter in the Task List. There are also additional options for creating a new todo by right clicking on the Task List.

Figure 3. Creating a new todo by pressing Ctrl + Enter and typing in the title.
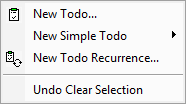
Figure 4. Menu that appears when you right click in the Task List.
Select a time range in the Appointment View and the start typing the appointment and either click somewhere outside the text area or commit it with Enter. There are additional options for creating an appointment when you right click the selected time range.
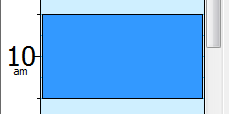
Figure 5. Selecting a time range from 9:30am to 10:30am by clicking and dragging.
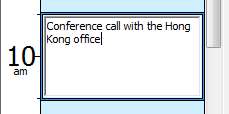
Figure 6. Creating a new appointment by typing into the selected time range.
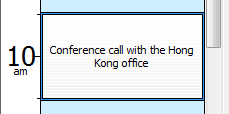
Figure 7. The finished appointment.
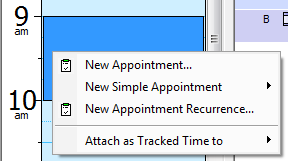
Figure 8. Menu that appears when you right click a selected time range in the Appointment View.
Tasks that repeat are created by right clicking either the Appointment View and selecting New Appointment Recurrence or by right clicking the Task List and selecting New Todo Recurrence. A window will appear for the new Task Recurrence.
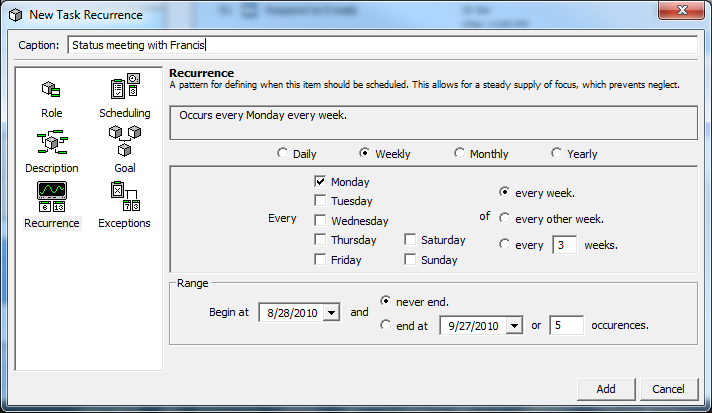
Figure 9. New Task Recurrence window.
Tasks have categories of priority:
A - Critical tasks, these tasks have serious consequences if they aren't completed. Usually reserved for urgent and important tasks.
B - Important tasks. They don't need to be urgent, many productivity books recommend that you pick at most 6 of these per day and protect your time to spend on them.
C - Desired tasks, these tasks would be nice to complete but have little impact on your future life. If this is the case, why list them at all? It is easier to list something and let yourself never get to it, than to directly kill it entirely.
Within each category there is an order of importance. The most important task in a category has the number 1. The number increases by 1 for each task in that priority category.
You can change priorities by dragging and dropping or by editing the priority column.
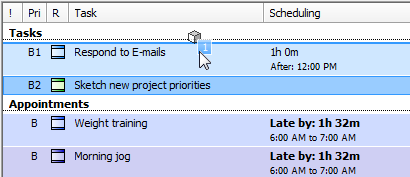
Figure 10. Changing priority by drag and dropping.
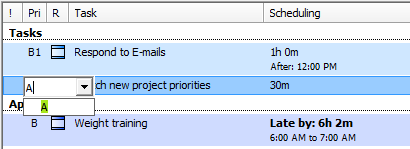
Figure 11. Setting a new priority in the priority column.
You can edit the different attributes of a task by moving the focused cell and beginning to type. Attributes with a list of options, such as the role column, will filter results as you type. You can then select the item you want by either using Tab and Shift + Tab, the up and down arrow keys, or by using the mouse.
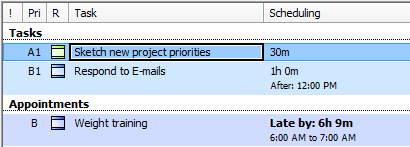
Figure 12. The focused row is the A1 task and the focused cell is task column. You can tell because it has a black border around it.
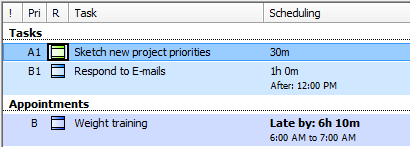
Figure 13. Using the left arrow key, or Shift + Tab, we move the focused cell to the left by one cell.
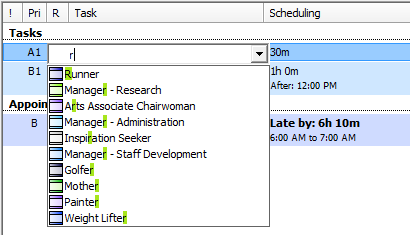
Figure 14. When we hit the 'r' key we are presented with a list of matches.
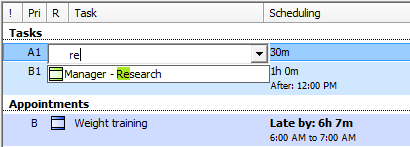
Figure 15. We type another letter to narrow the results down.
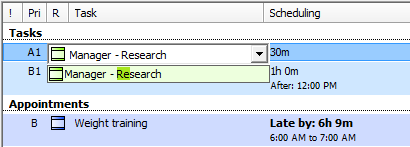
Figure 16. We use the up and down arrow keys, or Tab and Shift + Tab, to select the item we'd like and then push enter to close the edit control.
You can also right click on a task to get a context menu.
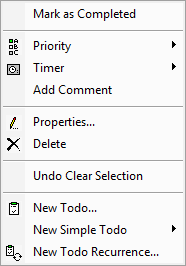
Figure 17. A context menu for the currently selected task that appears when you right click on an item.
When entering tasks many times you will want to make the same change to many tasks. This can be done by selecting the items you want to change and them making an edit to the focused item.
To select multiple items using the keyboard move to the first, or last, item you want to select. Then hold down the Shift key and use the up and down arrow keys to select additional items.

Figure 17. I have just entered 3 new tasks, notice that they don't have an estimate nor an associated role. The focused row, the row that has the black outline, is A3.

Figure 18. While holding down Shift I press the up arrow twice to also select the two items above the A3 task. The focused row is now A1.

Figure 19. By editing the scheduling cell with multiple columns selected they will all be edited with the same value.

Figure 20. After entering 50m as the estimate for the A1 task the other selected tasks have their estimates also set to 50m.

Figure 21. Using the arrow keys I can move to the role column and edit that as well for the selected tasks.

Figure 22. The selected tasks have their role set to "Manager - Research."
You can also select a range of items by clicking on the first, or last, item you want to select and then holding down the Shift key and clicking the item you'd like to select items up to. You can hold down the Ctrl key and click to toggle the selection of single items.

Figure 23. Select the first item of the range you'd like to select.

Figure 24. Holding the Shift key select the item at the end of the range you'd like to select.

Figure 25. The B2 task is unselected after being clicked on with the Ctrl key pressed.
To customize what columns appear in the Task List right click on the columns. A menu will come up that shows the available columns for that list with the columns currently being shown with a check next to them.
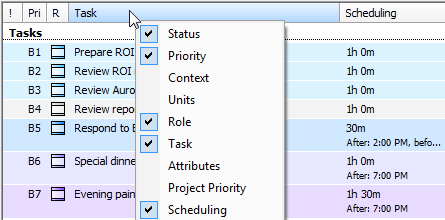
Figure 27. Right clicking on the Task List columns brings up the context menu for selecting columns.
This is the list of all the notifications you have set associated with the day. Use this to ensure that anything that is time sensitive and needs an alert is set. If it isn't in this list, then you won't be alerted.

Figure 1. Notifications appear in the top right of your screen.
When a notification is triggered—such as in figure #1—it remains in the notifications pane and on the screen until you click it. When clicked, the alert will marked as read and won't come back unless:

Figure 2. Editing an alarm.
To add deadlines, or schedule before constraints, use the task list.
The notifications pane does let you add alarms, as well as remove anything that appears in the notifications pane. Removing a deadline, or a schedule before constraint, just removes that attribute from the associated task. It doesn't delete the task. Removing an alarm deletes the task. If the alarm was associated with a task, then it is the same type of deal as with the deadlines and schedule before constraints. The alarm is removed, but the task stays.
You can right click on a notification to have it remind you again after a certain duration. This marks the current notification as read just like a click would, but also adds an alarm for the notification.
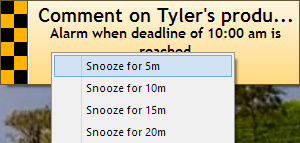
Figure 3. Snoozing a deadline.