Most items in Watership Planner are colored coded based on the role they are associated with. Watership Planner comes with a generic set of life areas and roles to get you started. You can also customize the roles and colors.
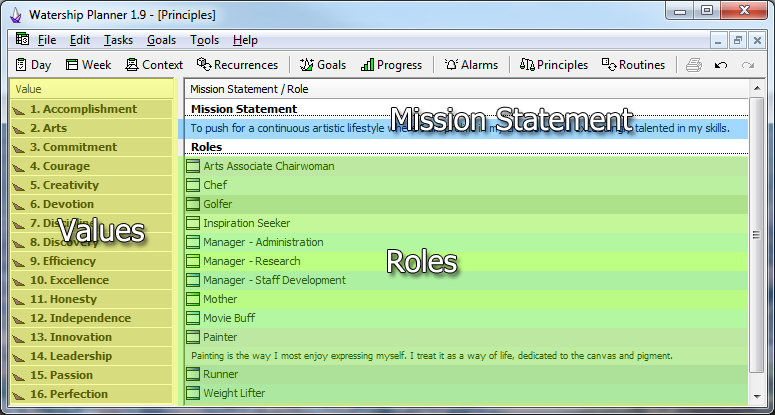
Figure 1. The different areas of the Principles window.
Begin by right clicking on the Values list and select the "Value Discovery Exercise..." menu item.

Figure 2. Right clicking the Values list gives an option to the Value Discovery window.
This will bring up the Value Discovery exercise. You will be presented with a list of example values in the left list. To begin discovering your values start by double clicking all the values that you find important to you. Most of them will probably look good to you so try to pick only the most important ones. We are trying to create a list of your most important values.
Double click the values you find important in the left list hand side to move them over to the right list to begin to find the most important values. Try to divide the list in half or smaller keeping just the most important values on the right list. When you are finished click the "Next >>" button. You can continue this process of selecting the most important values from the left list until you have a list of your most important values.
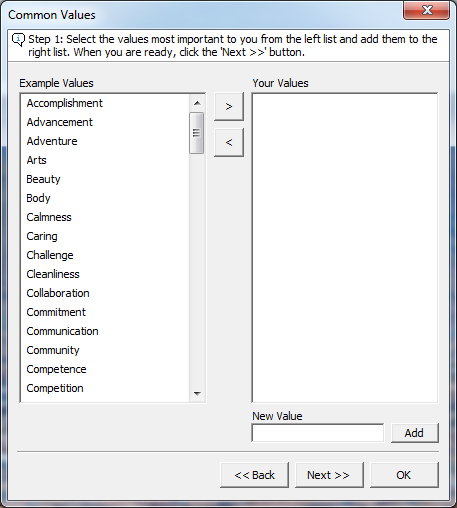
Figure 3. The Value Discovery Exercise window.
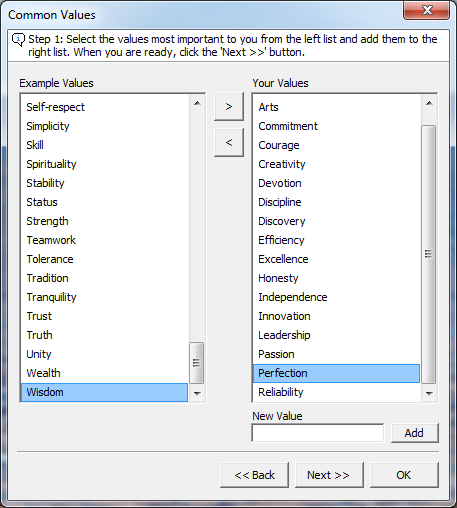
Figure 4. Moving the values we find most important to the right list.
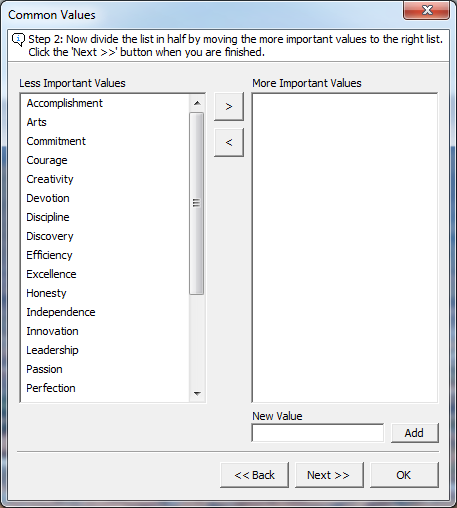
Figure 5. After selecting some important steps we click "Next >>" and pick the most important values from the new list on the left.
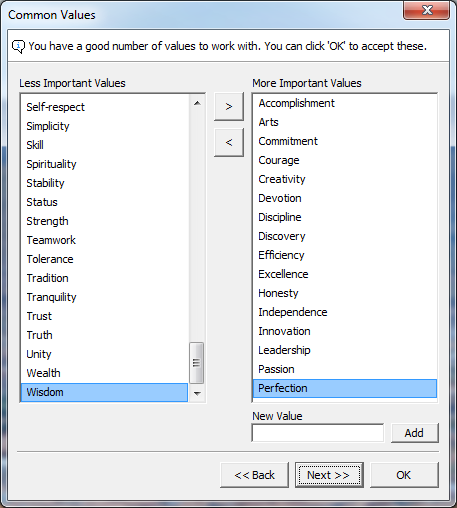
Figure 6. After we have done enough times we are left with a list of values we can focus on. Press the 'OK' button to accept these values.
You can change the order of your values by drag and dropping. Having your values in order is a good way to gain clarity when making value based decisions.
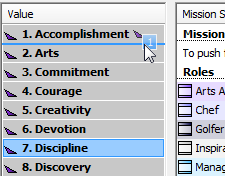
Figure 7. Dragging and dropping to set the order of your values.
You can also add a description to your value to make it more personal by right clicking and selecting the "Properties..." menu item.
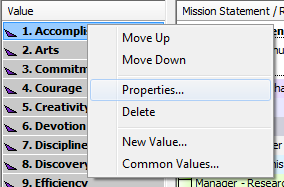
Figure 8. Right clicking a value brings up a context menu with additional options.
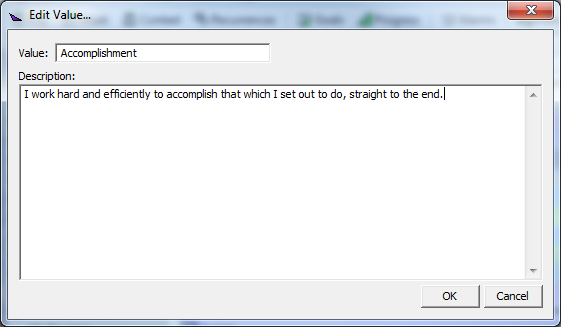
Figure 9. The Properties window for a value. Here we can enter a description.
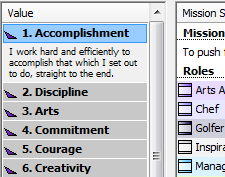
Figure 10. The Value List after we have set the description for the "Accomplishment" value.
If you have a mission statement or would like to write a underlying life mission from the values you've entered begin by select the mission statement cell as shown in figure 11. Then begin typing, use Ctrl + Enter to accept what you've typed.

Figure 11. Selecting the mission statement cell.

Figure 12. Typing in a mission statement.
A role is a specific area of your life that you would like to have a category for in the program. Examples include: swimmer, poet, adventurer, organizer, dancer, mentor, philosopher, etc. By using roles you can get an overview on what areas of your life your time is being spent. A goal can have values assigned to it. By seeing what roles are made up of your most important values you can see what areas in life are the most fulfilling to you.
To add a new role right click the roles area of the list and select the "New Role..." menu item.
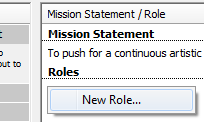
Figure 13. The "New Role..." menu item.
You can also edit the properties of an existing role by right clicking and selecting the "Properties..." menu item.
In either case you will be presented with the Edit Role Window as in figure 15. Here you can customize the assigned values, description and colors.
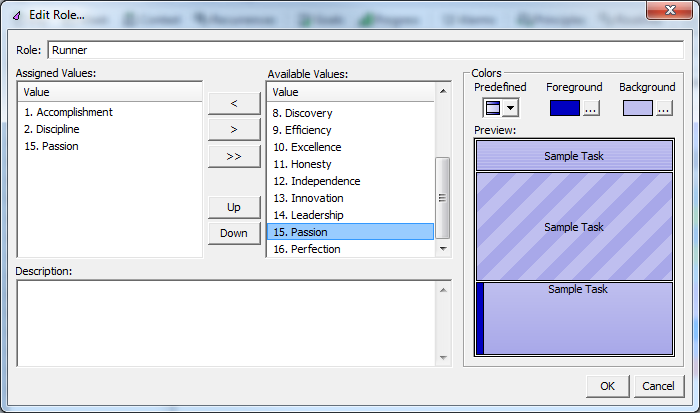
Figure 15. The Edit Role Window.
Add the selected value from the Available Values List to the Assigned Values list.
Remove the selected value from the Assigned Values List.
Remove all the values from the Assigned Values List.
Move the selected value from the Assigned Values List up one.
Move the selected value from the Assigned Values List down one.
Accept current values.
If adding a value it cancels creating a new role. If editing an existing value it will discard the current values and the role will remain unchanged.
A role can have an ordered list of assigned values. To assign values to this role select the value you'd like to add from the "Available Values" list and either double click it or click the
![]() button. To remove values that have already been assigned click the
button. To remove values that have already been assigned click the
![]() button or to clear the entire list click the
button or to clear the entire list click the
![]() button.
button.
The colors can be set by selecting a predefined color combination from the drop down list under the label "Predefined." The foreground and background colors can be customized by clicking on the buttons next to the colors cells under the labels "Foreground" and "Background." A preview of how the currently selected colors will look as an appointment, an automatically scheduled task and as a tracked time cell is show under the color selection controls.
You can give the role a detailed description in the text box under the "Description" label. This is a good place to write out your expectations for yourself in this area.